The Microsoft Entra ID integration supports additional data sync options beyond core user sync: admins can optionally enable Custom Fields sync and Teams sync per integration instance.
These options are configured in Company Settings and may require re-authorization depending on when the integration was originally set up.
Sync Options
User Sync
Core user data is always synchronized with Entra ID. This option cannot be disabled and forms the foundation of the integration.
Custom Fields
When enabled, all active custom employee fields are synced to Entra ID as Extension Properties. Archived fields are excluded from sync.
Extension properties are not visible in the Azure Portal. They can only be accessed via the Microsoft Graph API.
Each custom field is stored as a separate extension property. For example:
extension_<appId>_UserCustomFieldData02 = {"employeeCategory": "Fulltime"}
extension_<appId>_UserCustomFieldData03 = {"tshirtSize": "L"}
A metadata property tracks the total field count:
Use cases: Cost centers, employee categories, and other organization-specific employee data.
Teams
When enabled, Simployer teams are synced as Security Groups in Entra ID. User memberships are managed automatically as team membership changes in Simployer.
| Simployer | Entra ID |
| Team | → | Security Group Matched by exact name |
| Team membership | → | Group membership |
Sync behavior:
| Event in Simployer | Result in Entra ID |
|---|---|
| Team created | Security group created immediately |
| Employee added or removed from team | Group membership updated |
| Team renamed | Group renamed |
| Team deleted | Group deleted |
Security group properties set by the integration:
| Property | Value |
|---|---|
| displayName | Exact team name from Simployer |
| securityEnabled | true |
| mailEnabled | false |
| description | "Auto-created group for team: {teamName}" |
Use cases: Access control in Microsoft 365, SharePoint permissions, and conditional access policies.
How to Configure
1 | Navigate to Company Settings Open Company Settings, then select Integrations from the menu. |
2 | Locate the Entra ID section Find the Microsoft Entra ID section in the integrations list. |
3 | Open the configuration panel Click the Configure button to open the integration configuration panel. |
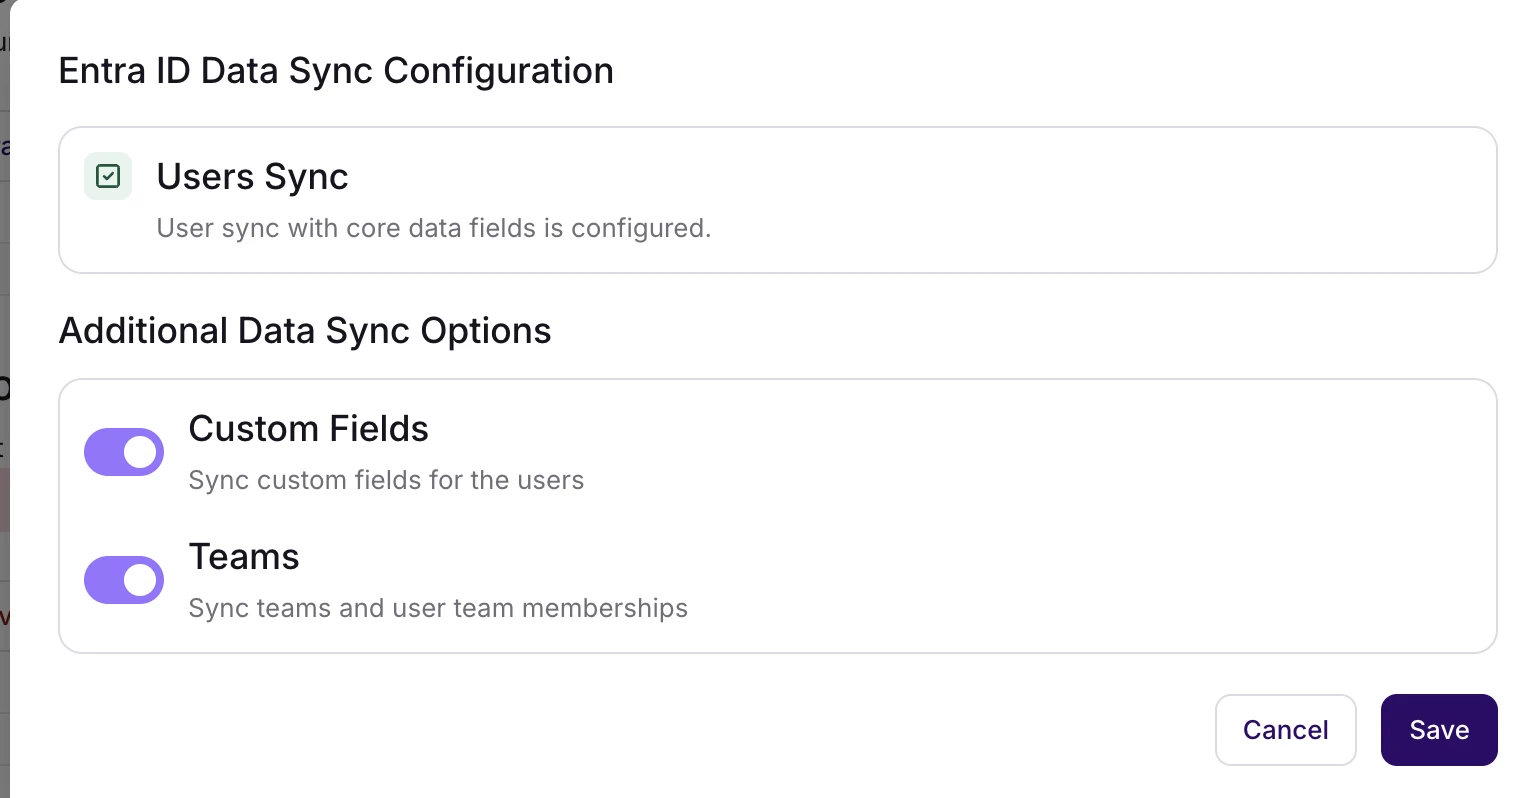
4 | Enable the desired sync options Toggle on Custom Fields, Teams, or both, depending on which options are needed. |
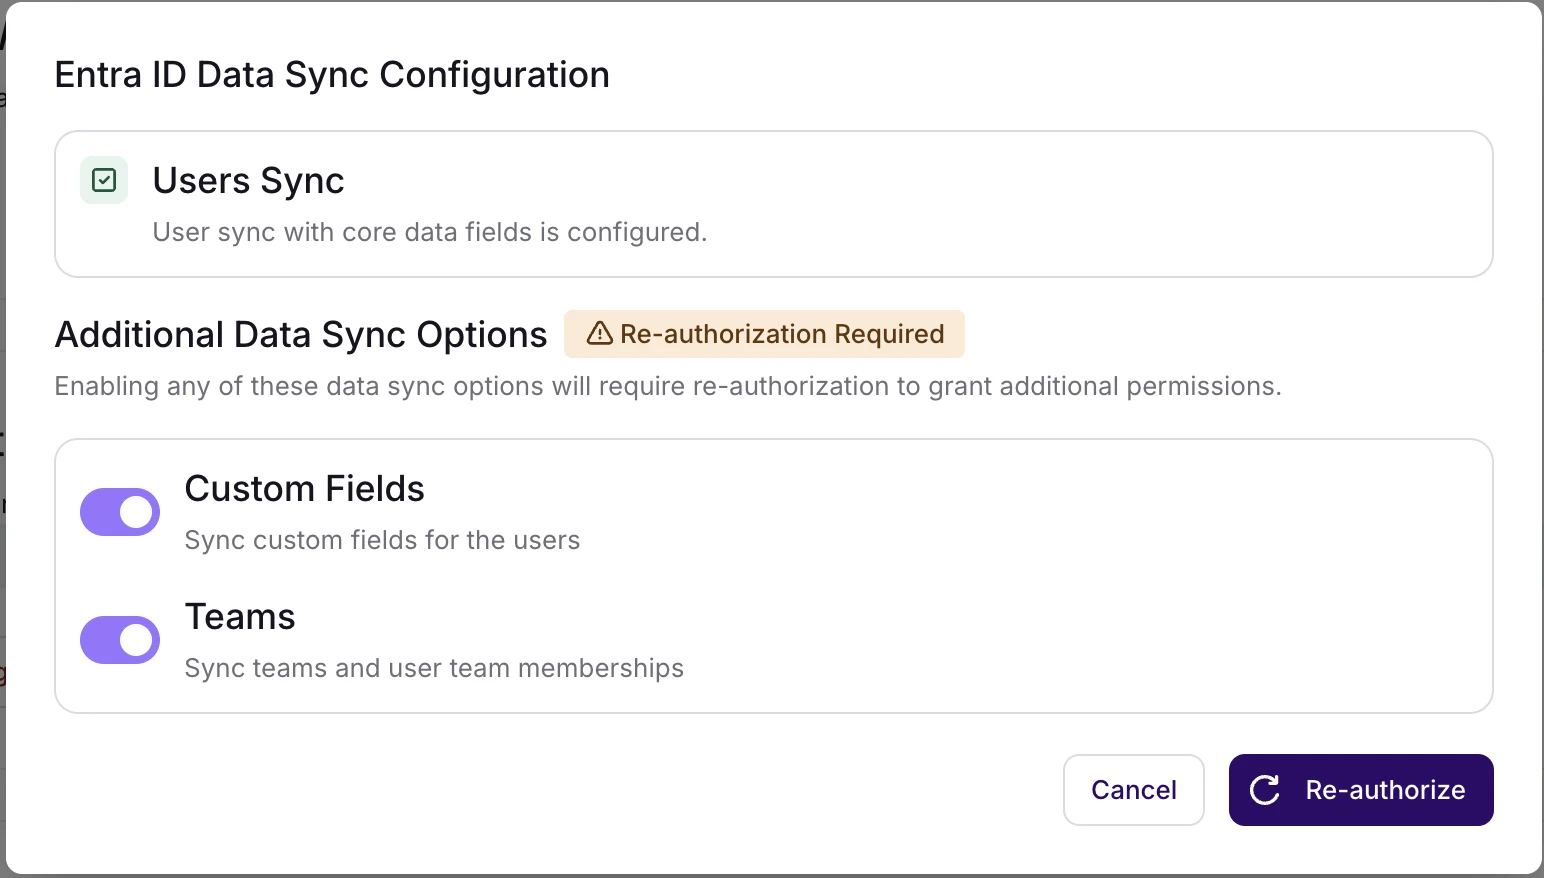
5 | Save or re-authorize Click Save. If additional permissions are required, the button changes to Re-authorize. Complete the re-authorization flow to apply the changes. |

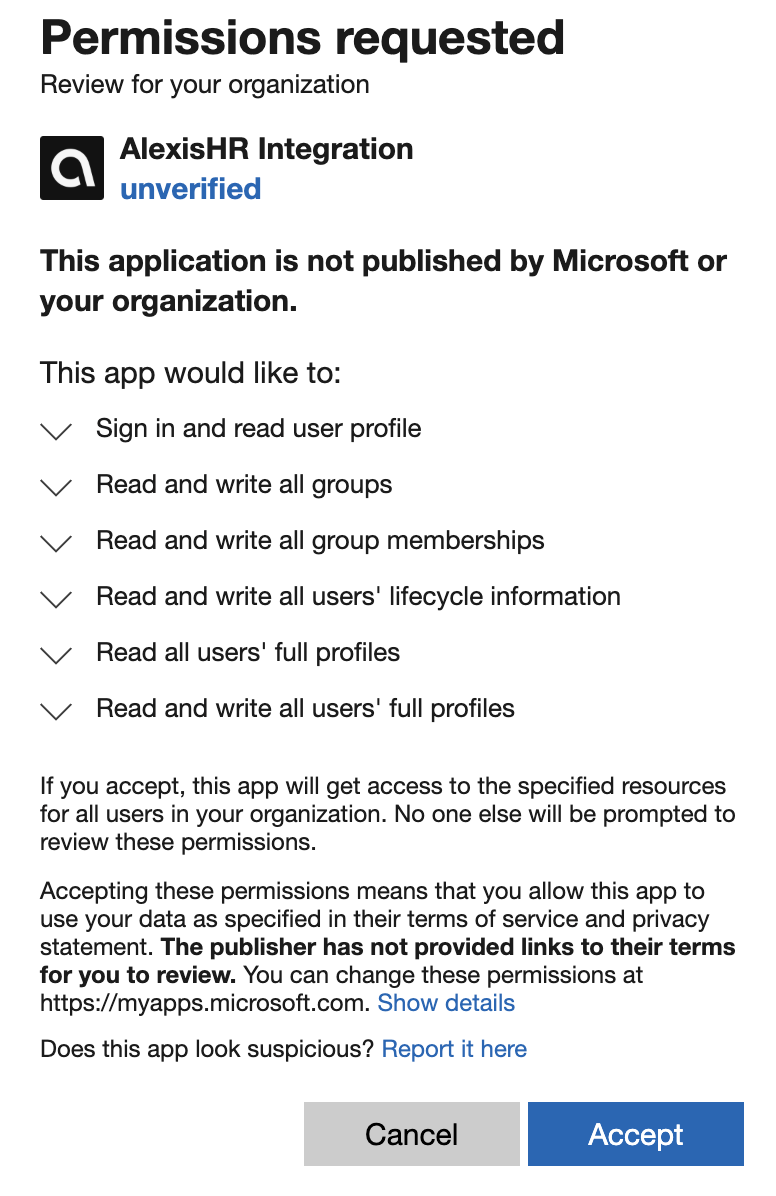
Permissions required when Teams sync is enabled:
| Permission |
|---|
| Read and write all groups |
| Read and write all group memberships |
Frequently Asked Questions
Will enabling these options affect my existing user sync? No. Core user sync continues unchanged. The additional sync options operate independently and do not modify existing user sync behavior. |
What happens if a sync option is disabled after being active? Future syncs for that option stop immediately. Existing data already written to Entra ID, such as extension properties or security groups, remains in place and is not removed. |
Is re-authorization required every time a change is made? No. Re-authorization is only required when enabling a feature that needs permissions not already granted to the integration. If the required permissions were granted during a previous authorization, no further action is needed. |
Troubleshooting
Changes not appearing in Entra ID
1 | Verify that the relevant sync option (Custom Fields or Teams) is enabled in the configuration panel. |
2 | Check that re-authorization was completed if it was required when the option was enabled. |
3 | Ensure the employee record has a valid work email address that matches an existing user in the Entra ID tenant. |
Re-authorization fails
Was this article helpful?
That’s Great!
Thank you for your feedback
Sorry! We couldn't be helpful
Thank you for your feedback
Feedback sent
We appreciate your effort and will try to fix the article