TABLE OF CONTENTS
1. Conversation lifecycle at a glance
Before diving into what you manage as an administrator, here's a quick look at how a conversation flows from start to finish. Most of these steps are carried out by managers and employees — your role is to set up the structure that makes them possible.
Conversation created — A manager creates a conversation with an employee, either ad-hoc or as part of a Conversation Round.
Independent preparation — Both participants write their reflections on the same discussion points, without seeing each other's responses.
Responses shared — Once both have submitted, their reflections become visible side-by-side. They can now add comments, create tasks, and generate a summary.
Conversation closed — The manager closes the conversation when the discussion is complete. Everything becomes read-only.
Employee signs off — The employee reviews the closed conversation and signs to acknowledge it.
As an administrator, you don't take part in conversations between others — but you shape the experience by managing Conversation Rounds, templates, and settings.
2. Conversation Rounds
Conversation Rounds let you run structured conversations across the whole organisation or a defined group of employees. Each round groups conversations under a common template, time period, and scope — so you can initiate, monitor, and follow up on a coordinated effort.
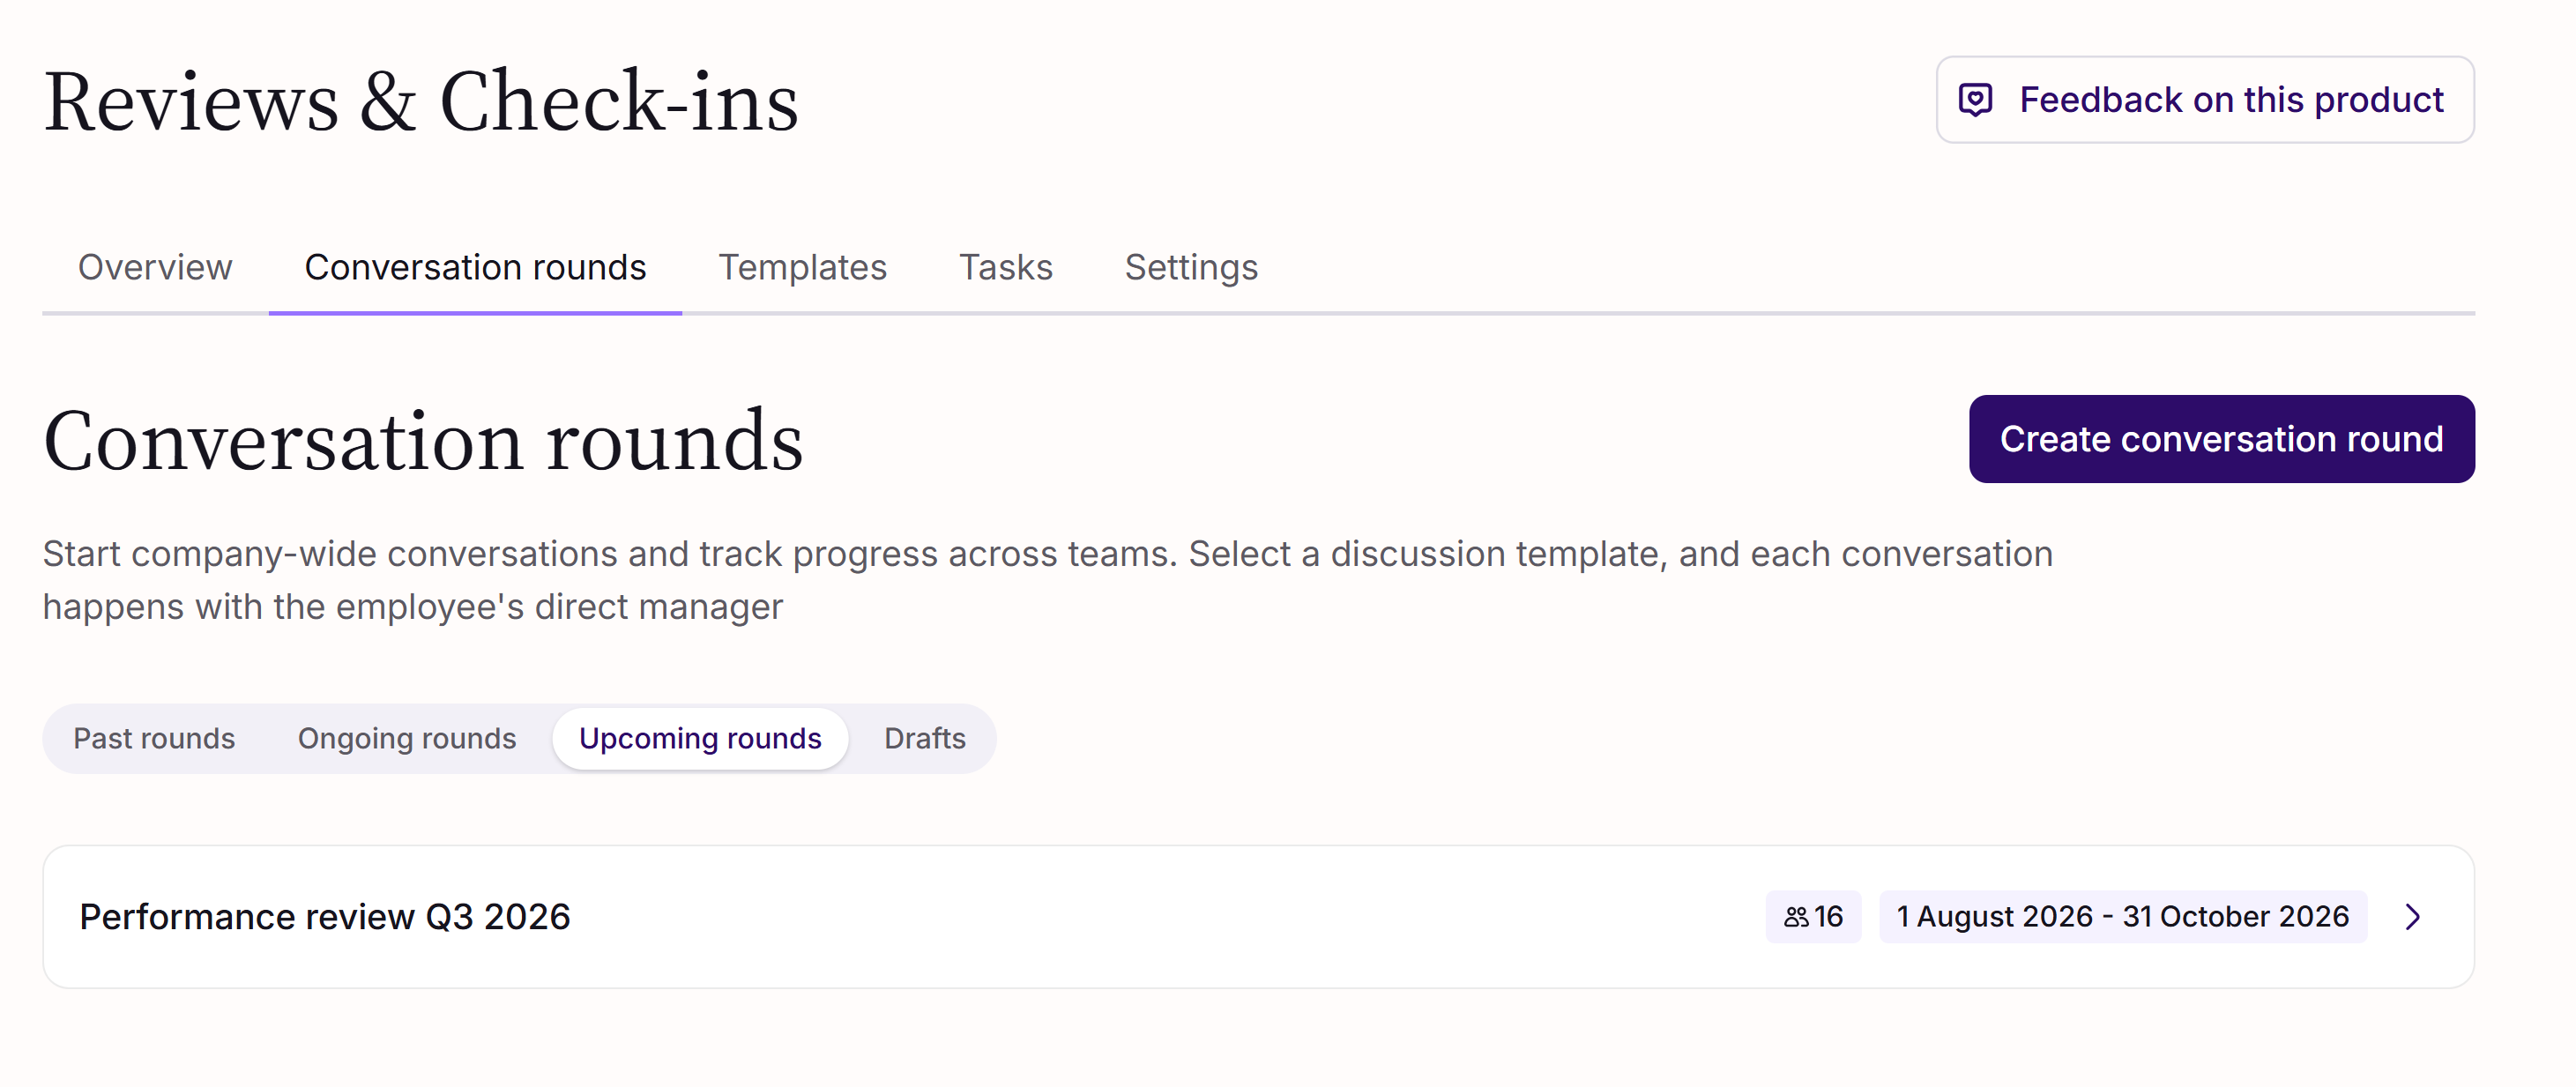
You'll find rounds under the Conversation rounds tab, organised into:
Ongoing — rounds currently within their date range
Upcoming — rounds whose start date is in the future
Past — rounds whose end date has passed
Drafts — saved rounds that haven't been started yet
Creating a round
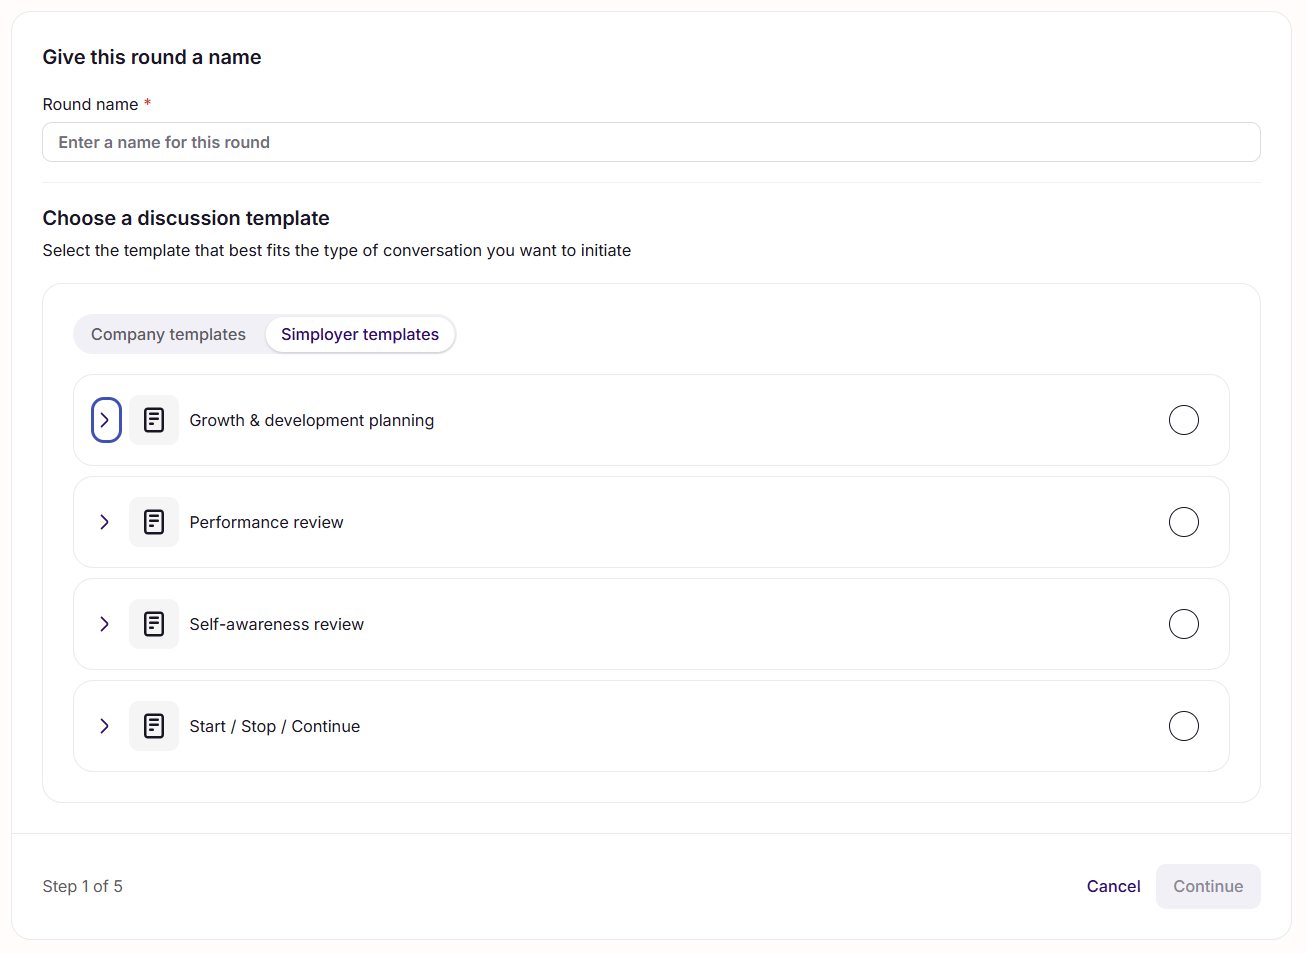
Click Create conversation round to open the 5-step wizard:
Name and template — Give the round a name and select the template all conversations will use.
Timeline — Set the start and end date. Note: employees can still respond to their conversations after the end date.
Scope — Choose who's included. Either everyone in the company, or a filtered selection by employee, employment type, office, team, department, or organisation. You can also exclude specific individuals.
When conversations are created — Choose how conversations are initiated (see below).
Review and start — Check your setup and click Start round.
You can click Save as draft at any point from Step 3 onwards. Drafts are not visible to managers.
Choosing how conversations are created
In Step 4, you choose between two modes:
Create conversations automatically — All conversations are created immediately when the round starts. Best when you want every employee to have a conversation without managers needing to take action.
When using a Simployer template (which has language versions), conversations are created in the language you see in the template preview during setup. Make sure the right language is selected before starting the round.
Employees added to the scope after the round has started won't get a conversation automatically — you'll need to create those manually.
Let managers create conversations — No conversations are created during setup. Managers decide when to create them for the employees in scope. This gives managers the flexibility to pick the right moment for each conversation. If a manager delays too long, you can still step in and create the conversation yourself.
When managers create the conversations, they choose the template language themselves.
Managers aren't notified automatically — you'll need to let them know when to begin.
Tracking progress
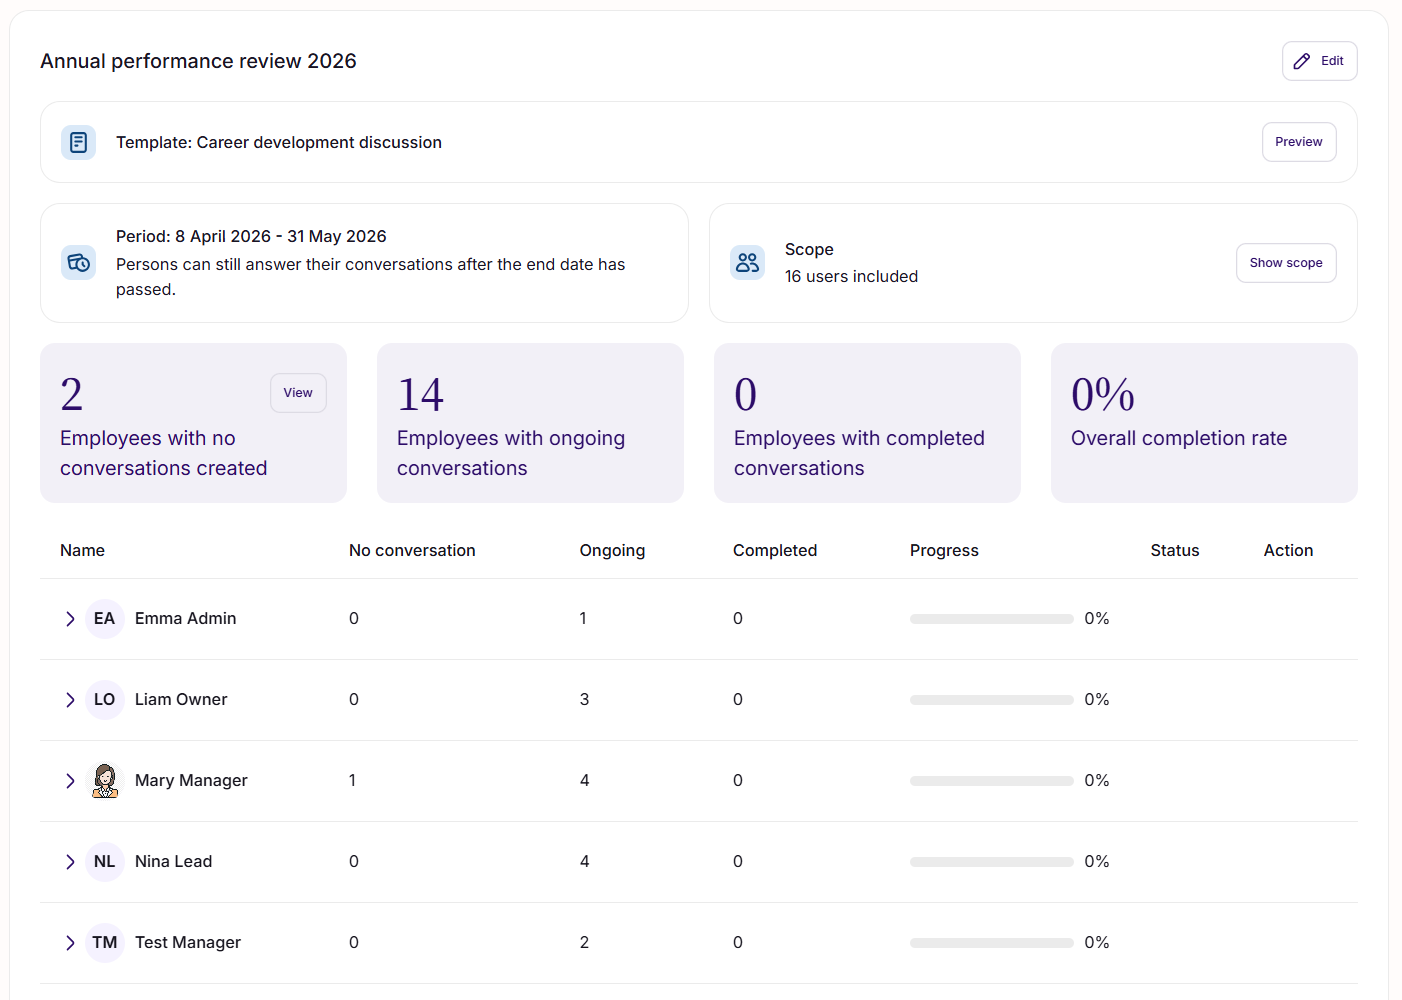
Click any round to open the Round details page, where you can monitor progress.
The overview shows four key numbers:
Employees with no conversation created — employees in scope who don't yet have a conversation in this round.
Employees with ongoing conversations — employees with at least one conversation that hasn't been closed yet. This includes conversations in Not started, In progress, and Submitted status.
Employees with completed conversations — employees with at least one closed conversation. This includes both Closed and Closed, not signed.
Overall completion rate — the share of employees in scope with a completed conversation.
Below that, the manager breakdown lists each manager with their employees' status. You can sort the table and expand each row to see employee-level details.
Good to know: Statistics count employees, not conversations. If an employee has both an ongoing and a completed conversation in the same round, they're counted as Completed.
Editing a round
From the Round details page, click Edit to change the name, template, time period, or scope.
Changing the template
Changing the template only affects conversations created after the change. Conversations that already exist in the round keep their original template and content. (This applies to all template changes throughout Reviews & Check-ins — see the Templates section.)
Editing the scope
The scope acts as a filter on what the Round details page shows. If you reduce the scope — for example by removing a group you previously included — the page will only show employees in the new scope.
Conversations already created for employees who are no longer in scope are not deleted. They remain fully available to the participants and can be continued as normal — they just no longer appear in the round's overview.
Deleting a round
You can delete a round from the Edit menu. This does not delete the conversations that were part of it — they remain available, but are no longer linked to the round. You'll see a warning telling you how many conversations are affected before you confirm.
3. Templates
Templates give employees and managers a shared agenda and structure for their conversations. Both participants see the same discussion points, which they reflect on independently before sharing their responses.
You'll find templates under the Templates tab.
Template types
There are three types of templates in Reviews & Check-ins:
| Type | Who creates it | Who can use it |
|---|---|---|
| Simployer templates | Maintained by Simployer | All managers (when enabled). Available in English, Swedish, and Norwegian. |
| Company templates | Created by administrators | All managers (when enabled) |
| Personal templates | Created by individual managers | Only the manager who created it |
As an administrator, you manage Simployer templates and Company templates. Personal templates are private to each manager and not visible to you.
Enabling and disabling templates
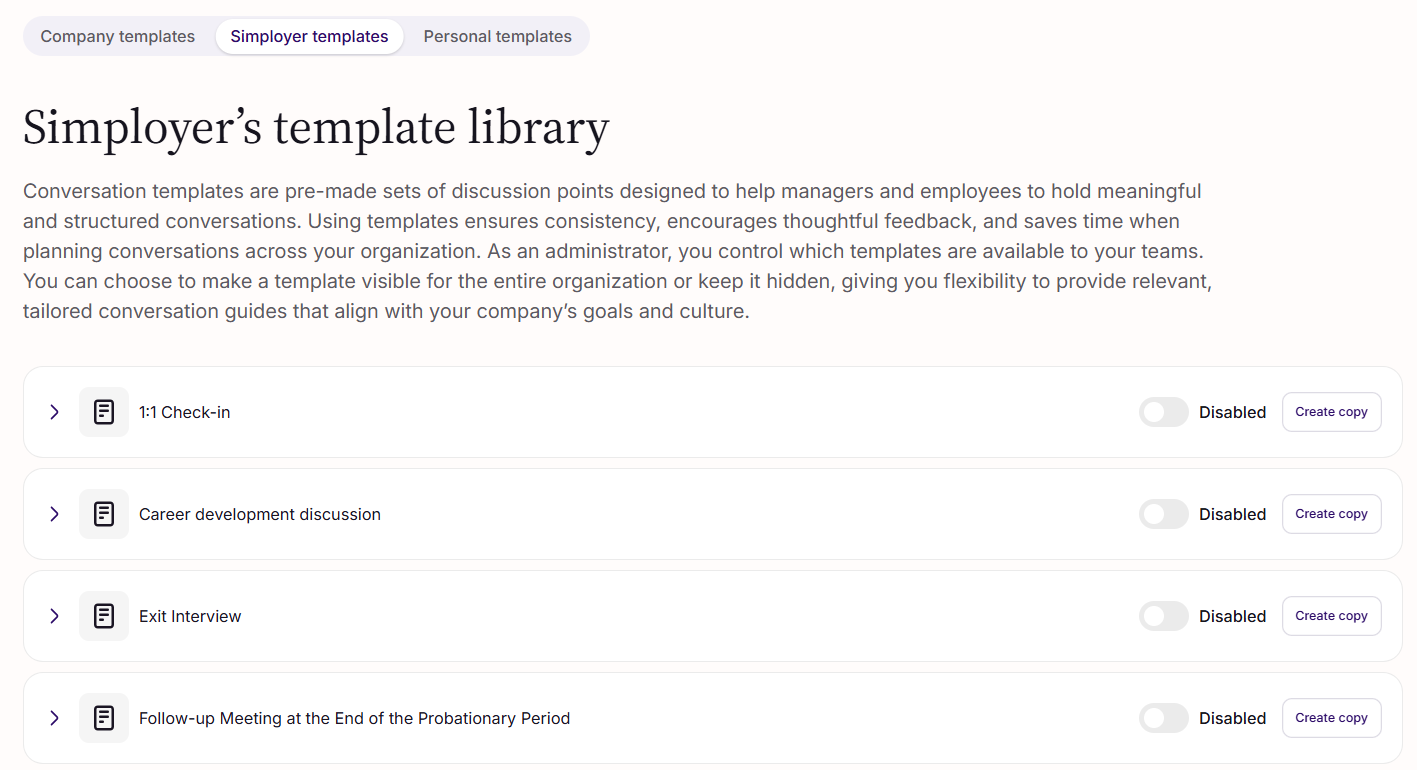
You control which templates managers can use when creating conversations.
Disabled templates are hidden from managers and cannot be selected for new conversations or rounds.
Disabling a template does not affect conversations or rounds that already use it.
This applies to both Simployer and company templates.
For Simployer templates, you can also enable or disable individual discussion points within a template — useful when most of a template fits your needs but some points don't.
Creating a company template
Click Create template in the Company templates section. A template consists of:
Name (required, must be unique)
Description — explains the template's purpose. Shown when browsing templates, not inside the conversation.
User guidelines (optional) — rich-text content shown to both participants via a Show guidelines button in the conversation. Useful for context, instructions, or links to supporting material. Supports headings, bold, lists, and links.
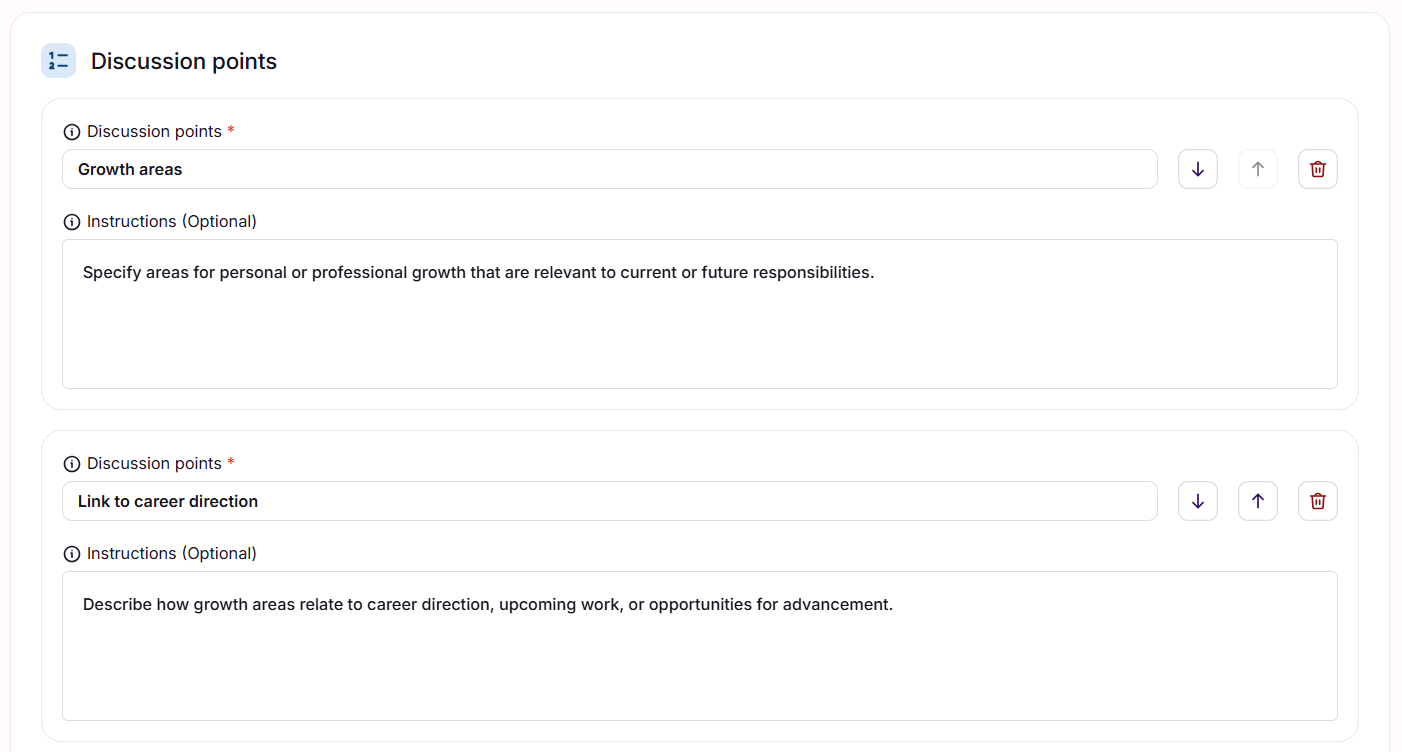
Discussion points — the prompts both participants reflect on. You can add as many as needed and reorder them.
Discussion point instructions (optional) — short guidance shown below a discussion point in the conversation, to clarify or steer the reflection.
Tips for writing good discussion points
Both the employee and the manager see the same discussion points, so they should be written in a neutral, shared way — not directed at one participant.
✅ Good:
"Progress since last time"
"Key challenges to discuss"
"Support needed moving forward"
❌ Avoid:
"What goals have you achieved?" → instead use "Goals achieved since our last discussion"
"What support could you provide?" → instead use "Types of support that could be beneficial"
Copying a template
You can copy any template — Simployer or company — to use as a starting point for a new company template. The copy is pre-populated with all fields from the original, with (Copy) appended to the name. For Simployer templates, the copy uses the language currently displayed. The copy is fully independent from the original — changes to either won't affect the other.
Editing and deleting templates
You can edit or delete any company template at any time.
Important: Template changes only affect conversations created after the change. Conversations that already exist keep the template content they were created with — including discussion points, user guidelines, and instructions. The same applies if you delete a template: existing conversations are not affected.
This rule preserves the historical accuracy of past conversations — what participants saw and responded to stays intact.
4. Settings
The Settings tab lets you configure options for Reviews & Check-ins. It's only visible if your organisation has access to the relevant settings.
Talent portal link
If your organisation previously used Simployer Talent, you can add a link to your legacy Talent portal so users can still access their historical conversations from there.
When configured, the link appears below the conversation list on both My conversations (for employees) and Team overview (for managers).
To set it up:
Enable the toggle to show the Talent portal link.
Enter your Talent subdomain (for example,
companyname). The system automatically appends.netcompetence.se.
Early access for reviewer
By default, neither participant can see the other's responses until both have submitted. The Early access for reviewer setting changes this for the reviewer side only.
When enabled:
As soon as the employee submits their responses, the reviewer can see them — read-only, alongside their own editable response form.
The employee can still not see the reviewer's responses until the reviewer has also submitted.
The conversation stays In progress until both have submitted. Comments, tasks, and the AI summary still become available only at that point.
The employee is not notified that early access is enabled.
The setting applies immediately to all conversations in your organisation, including ongoing ones.
To configure: toggle Early access for reviewer on or off on the Settings page. It is off by default.
Was this article helpful?
That’s Great!
Thank you for your feedback
Sorry! We couldn't be helpful
Thank you for your feedback
Feedback sent
We appreciate your effort and will try to fix the article