How to Create Document Templates and Initiate E-Signing
With e-signing in Simployer One, you can create secure signing processes using your own document templates or choose from a wide range of ready-made templates provided by Simployer.
Our e-signing solution offers a smooth experience, allowing documents to be signed electronically using a Simployer One account or BankID (Sweden only). Once signed, documents are automatically uploaded and stored in Simployer One.
Common Use Cases for E-Signing
E-signing is commonly used for:
- Employment contracts for candidates
- Changes or renewals of employment contracts
- Updates or amendments to job descriptions
- Confirmation of company policies (e.g. IT & Security, Data Protection & Privacy Policy, Code of Conduct)
- End-of-contract agreements or separation notifications
Permissions in E-Signing
By default, only Owners and Admins can create signing processes.
You can also allow Managers to initiate signing processes by adjusting permissions:
Settings → Permissions → Manager → E-signing / Signing process
Managers with this permission can start signing processes using existing templates, but they cannot edit templates. 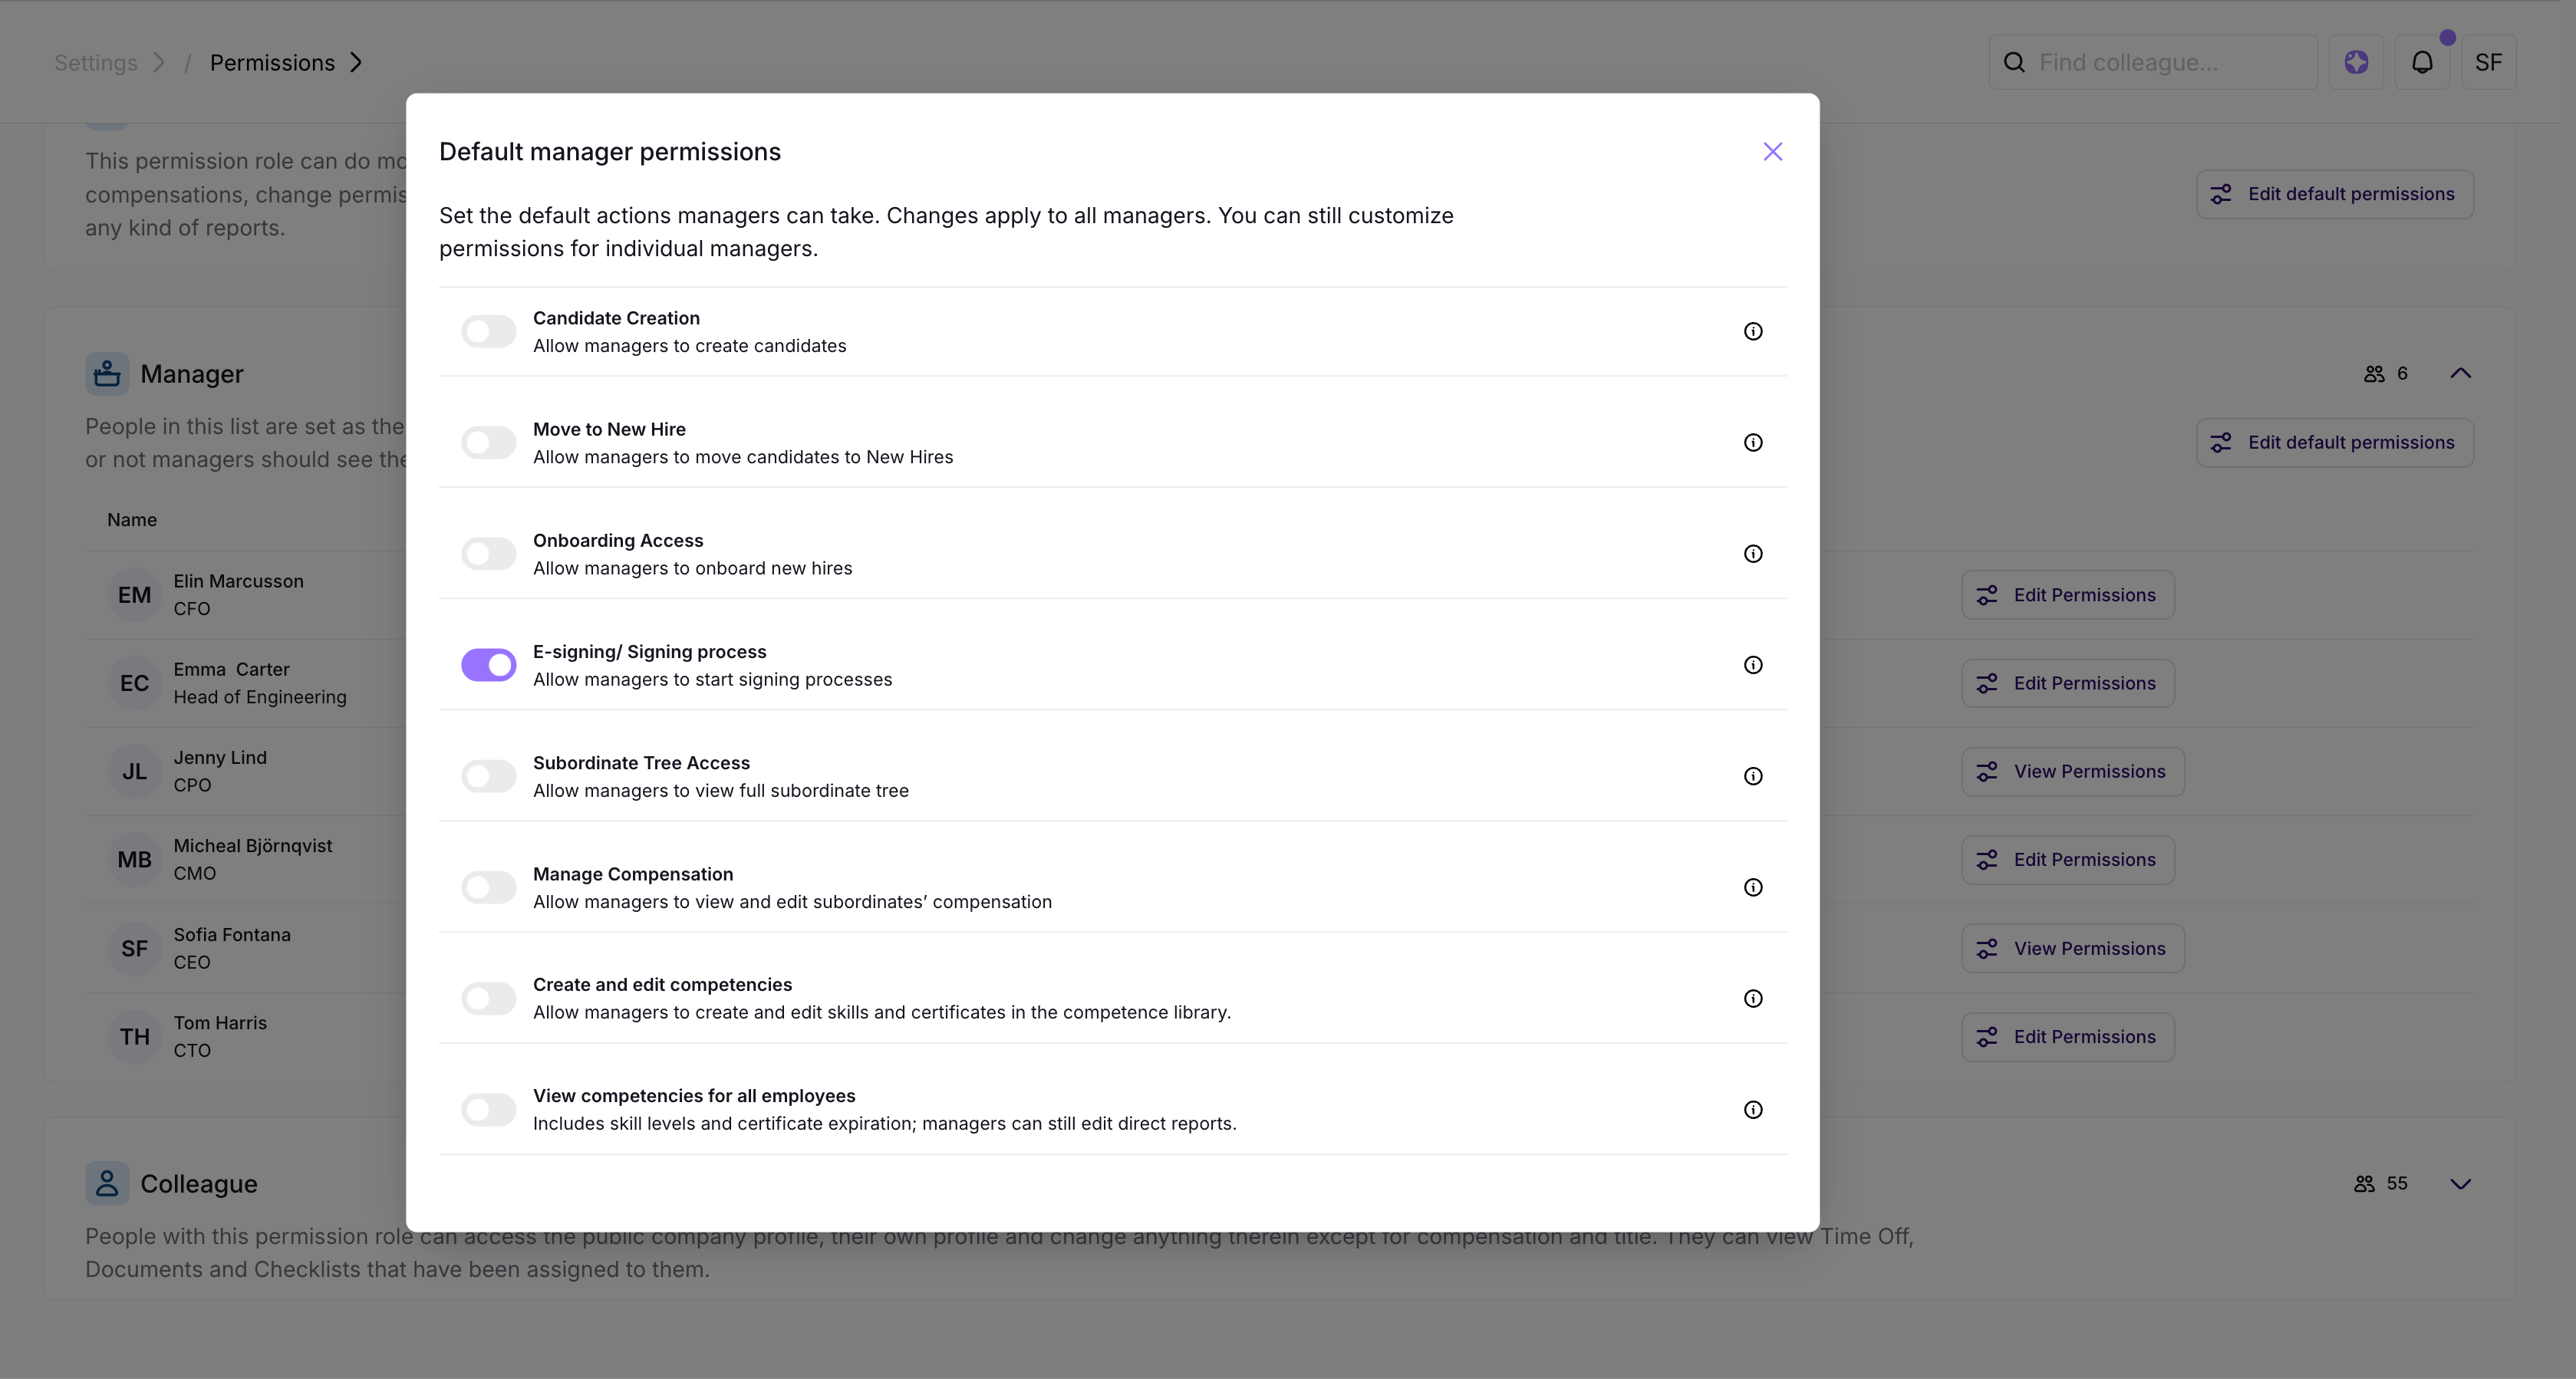
Roles in a Signing Process
A signing process consists of four roles:
1. Target Employee
The target employee is the person the document is about. Their profile data is used to replace any variables in the document.
- Only one target employee can be added per signing process
- Adding a target employee automatically adds them as a signing party (this can be removed manually if needed)
2. Signing Parties
Signing parties are the people who must sign the document.
- At least one signer is required
- You can add multiple signing parties
- Once all signing parties have signed, the document is sealed
- Signing parties get read-only access to the signed document under Profile → Documents → Shared documents
3. Observers
Observers are optional and can follow the progress of the signing process.
- Observers can view the document and track signatures
- They receive read access to the signed PDF
- You can add any number of observers
4. Signing Process Creator
The person who initiates the signing process.
- Can follow the process at all stages
- Can revoke or edit the signing process if needed
- Becomes the owner of the signed PDF in Simployer One
Note: Only Signing Parties, Observers, and the Signing Process Creator can access the signed document. If an employee needs access, they must be assigned one of these roles.
Create Your Own Document Templates
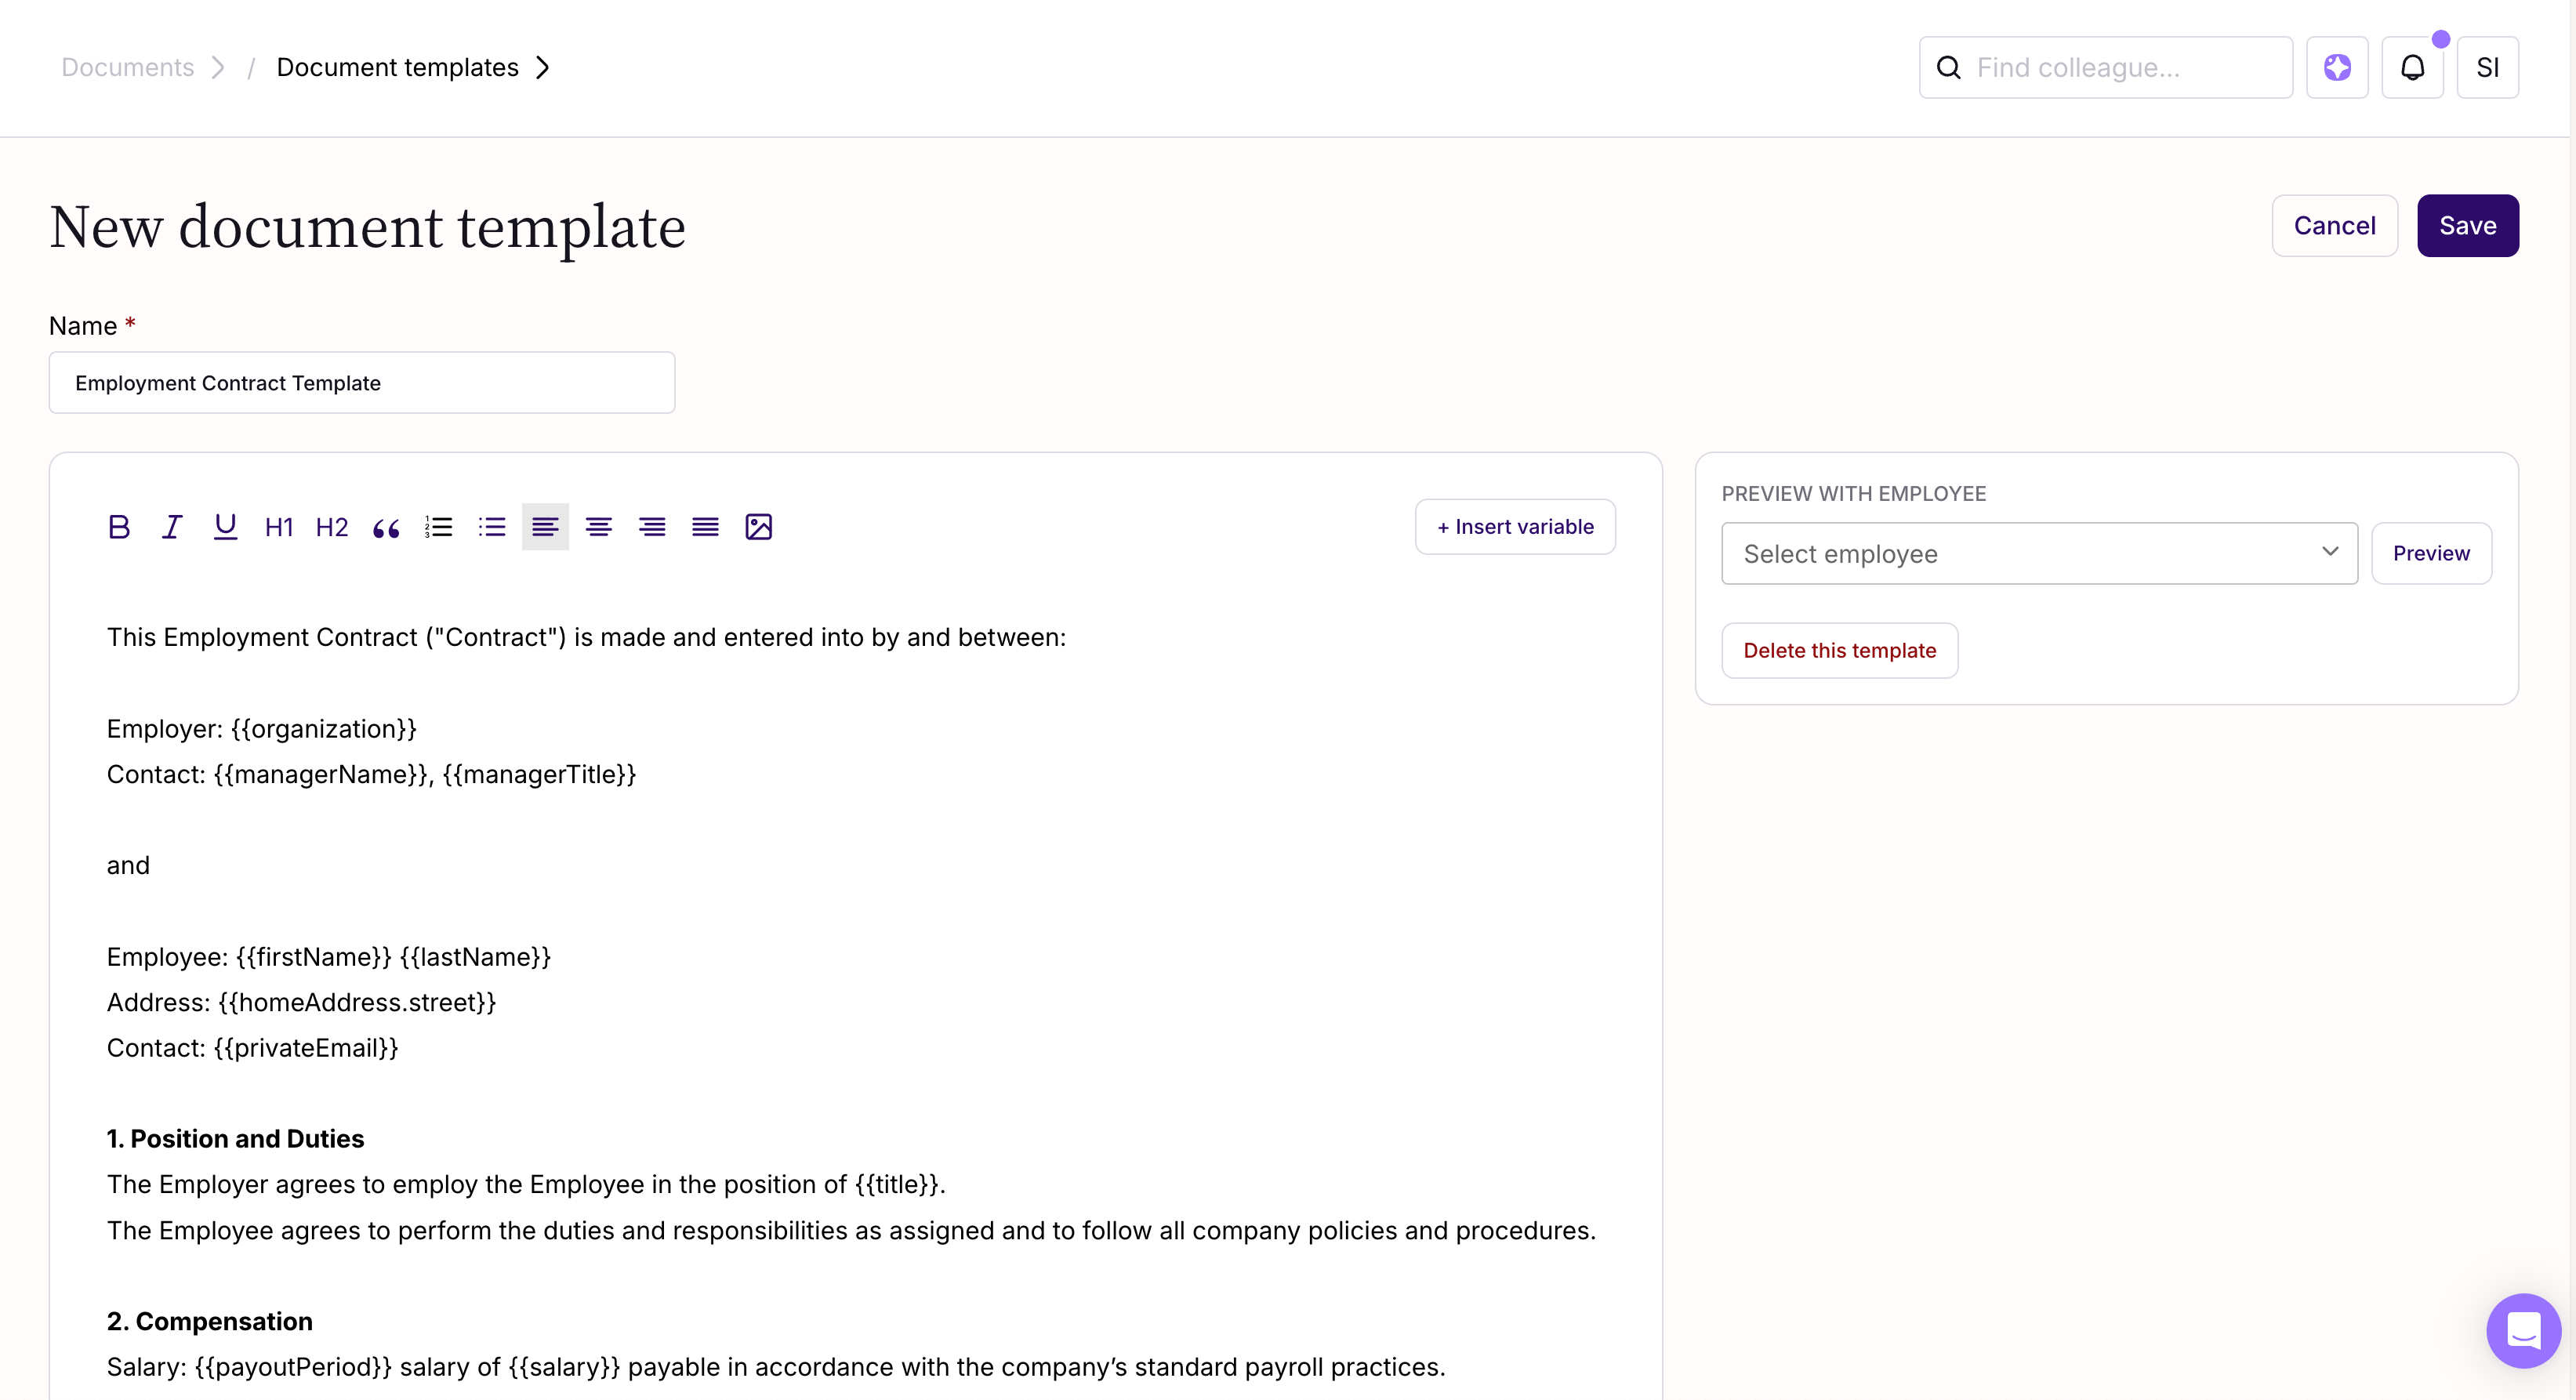
You can create custom templates for employees or candidates.
Path:
Documents → Document templates → + New template
(Available to Owners and Admins only)
Steps:
- Give the template a clear name (e.g. Employment Contract or Policy – Code of Conduct)
- Add your document content
- Use variables as placeholders (these are replaced with employee data during signing)
- Preview the template using employee data, if needed
- Click Save
You can edit templates at any time, but changes will only apply to new signing processes.
Ongoing signing processes will not be affected.
Set Up E-Signing for a Candidate
If a candidate is about to accept an offer, you can send them documents for signing before creating an employee profile.
Note: A candidate card is not the same as an employee profile. An employee profile is created only after moving the candidate to New hires.
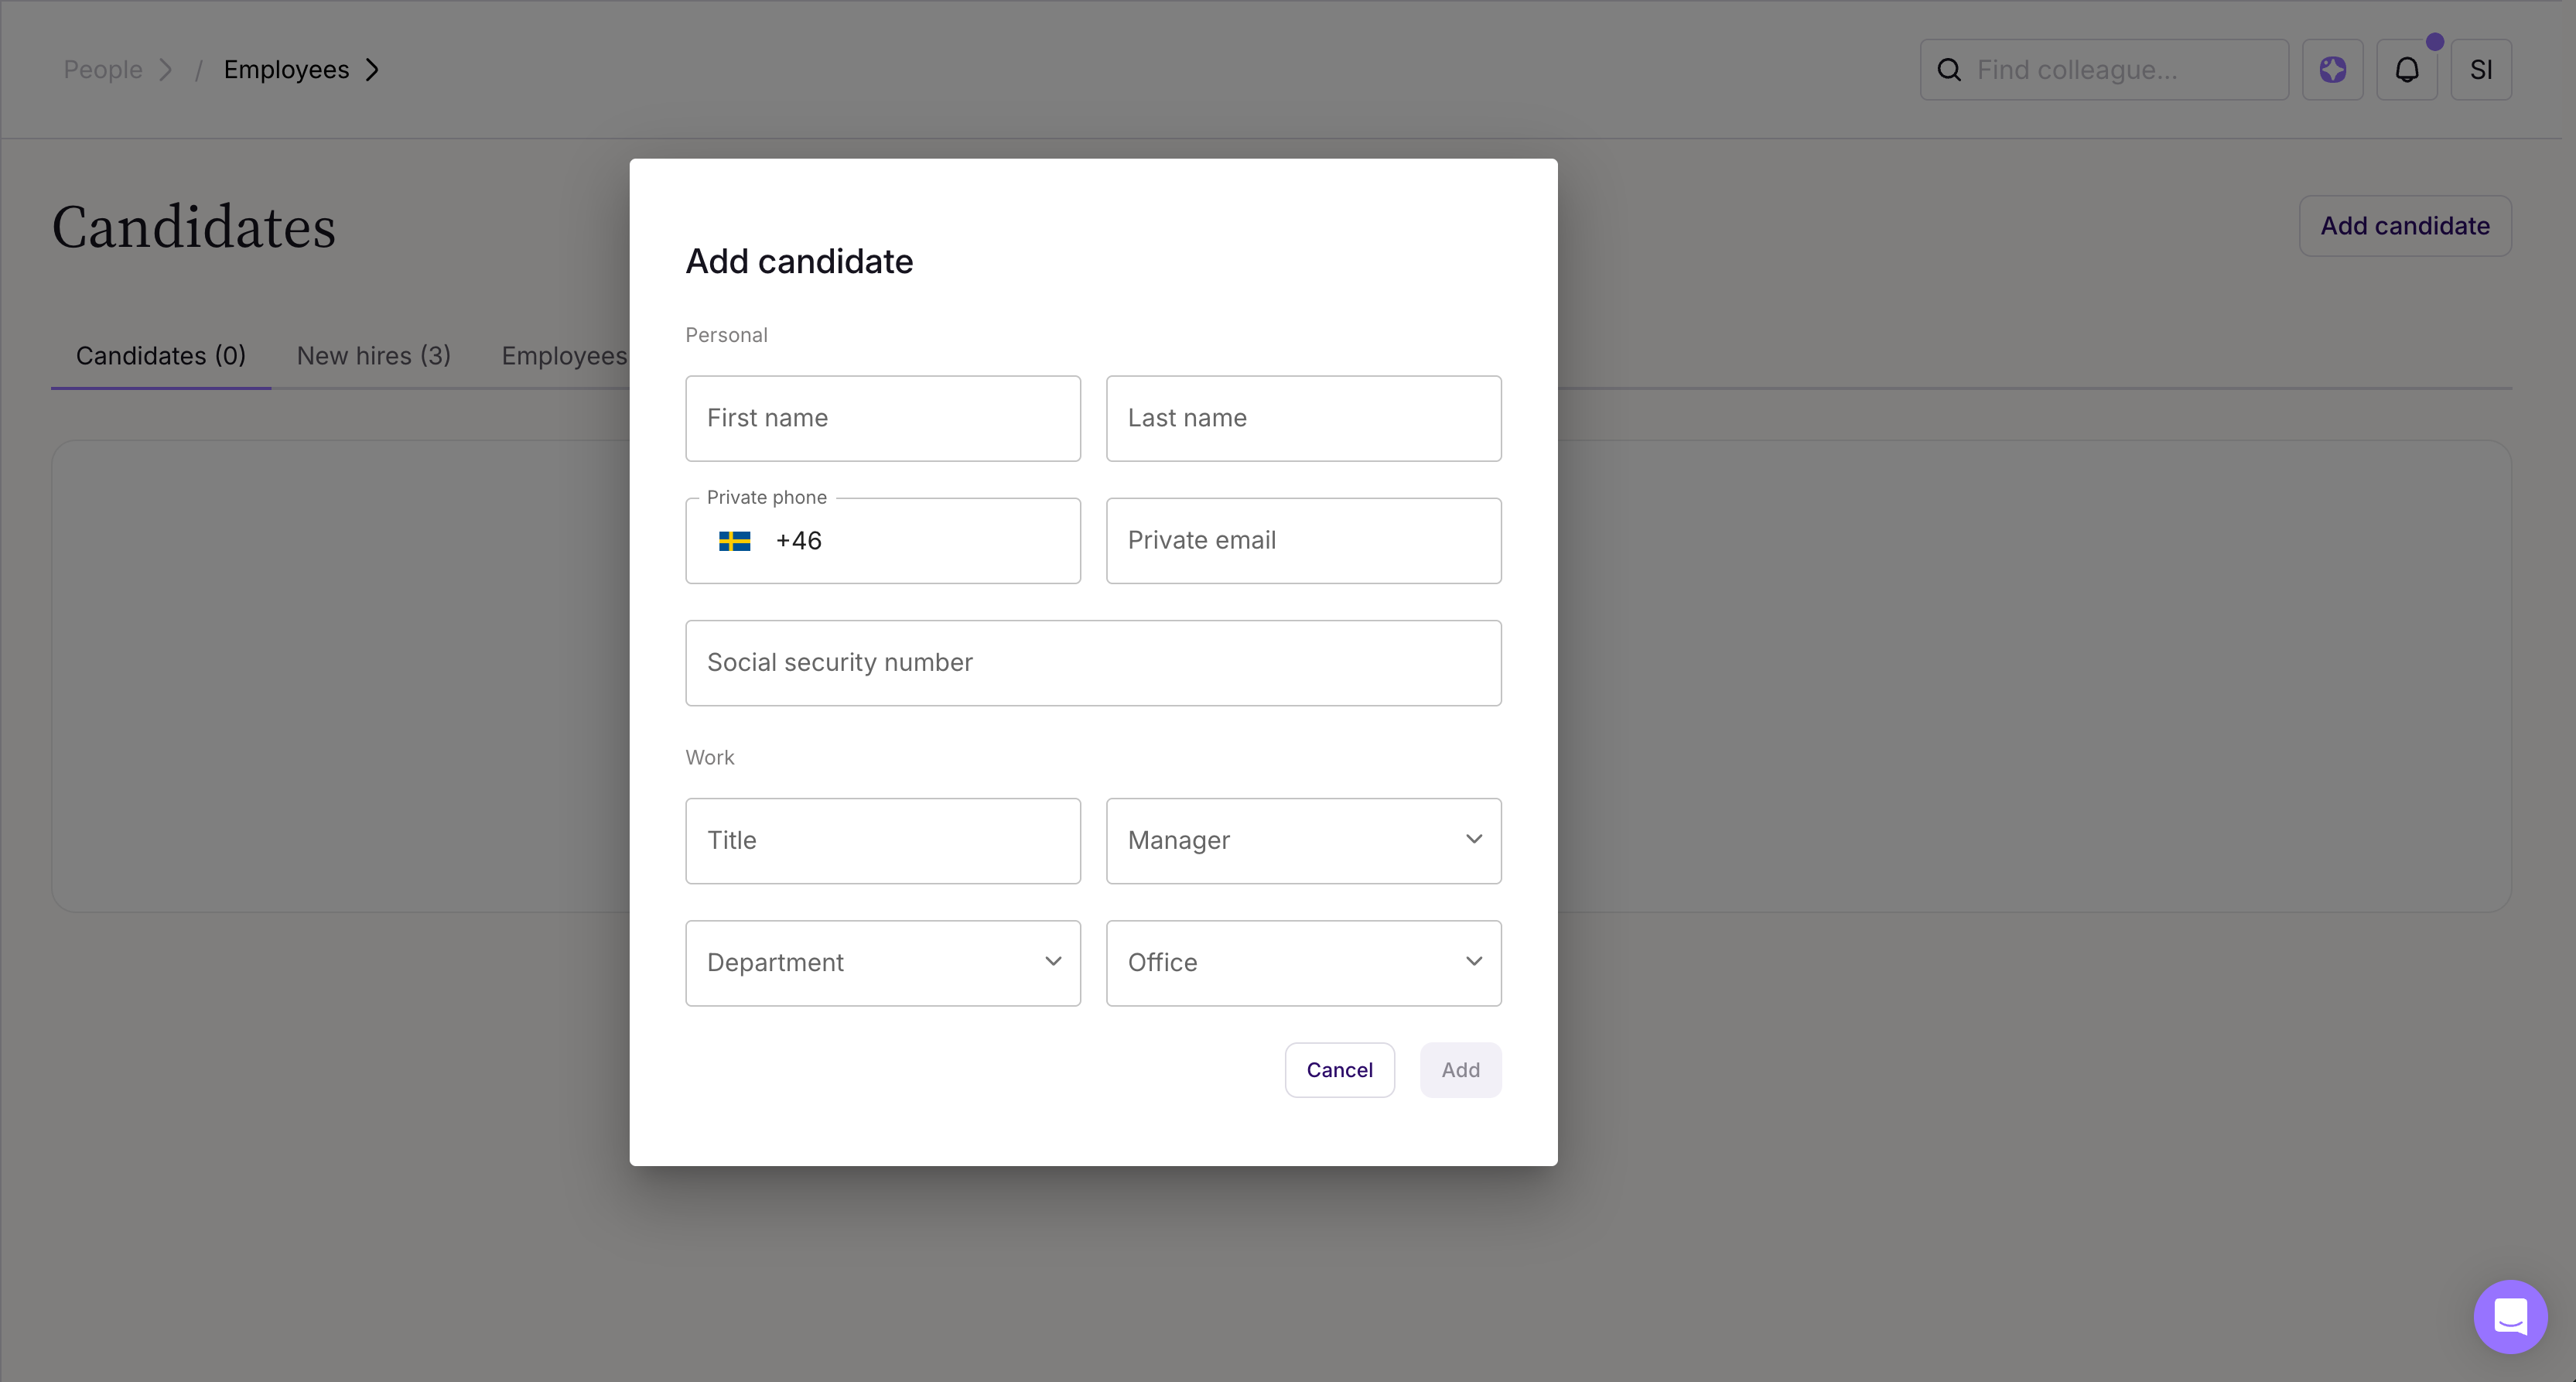
Create a Candidate Card
- Go to People → Employees → Candidates → Add candidate
- Add details such as name, email, and phone number
- No fields are mandatory
- Email is required for e-signing
- Click Save
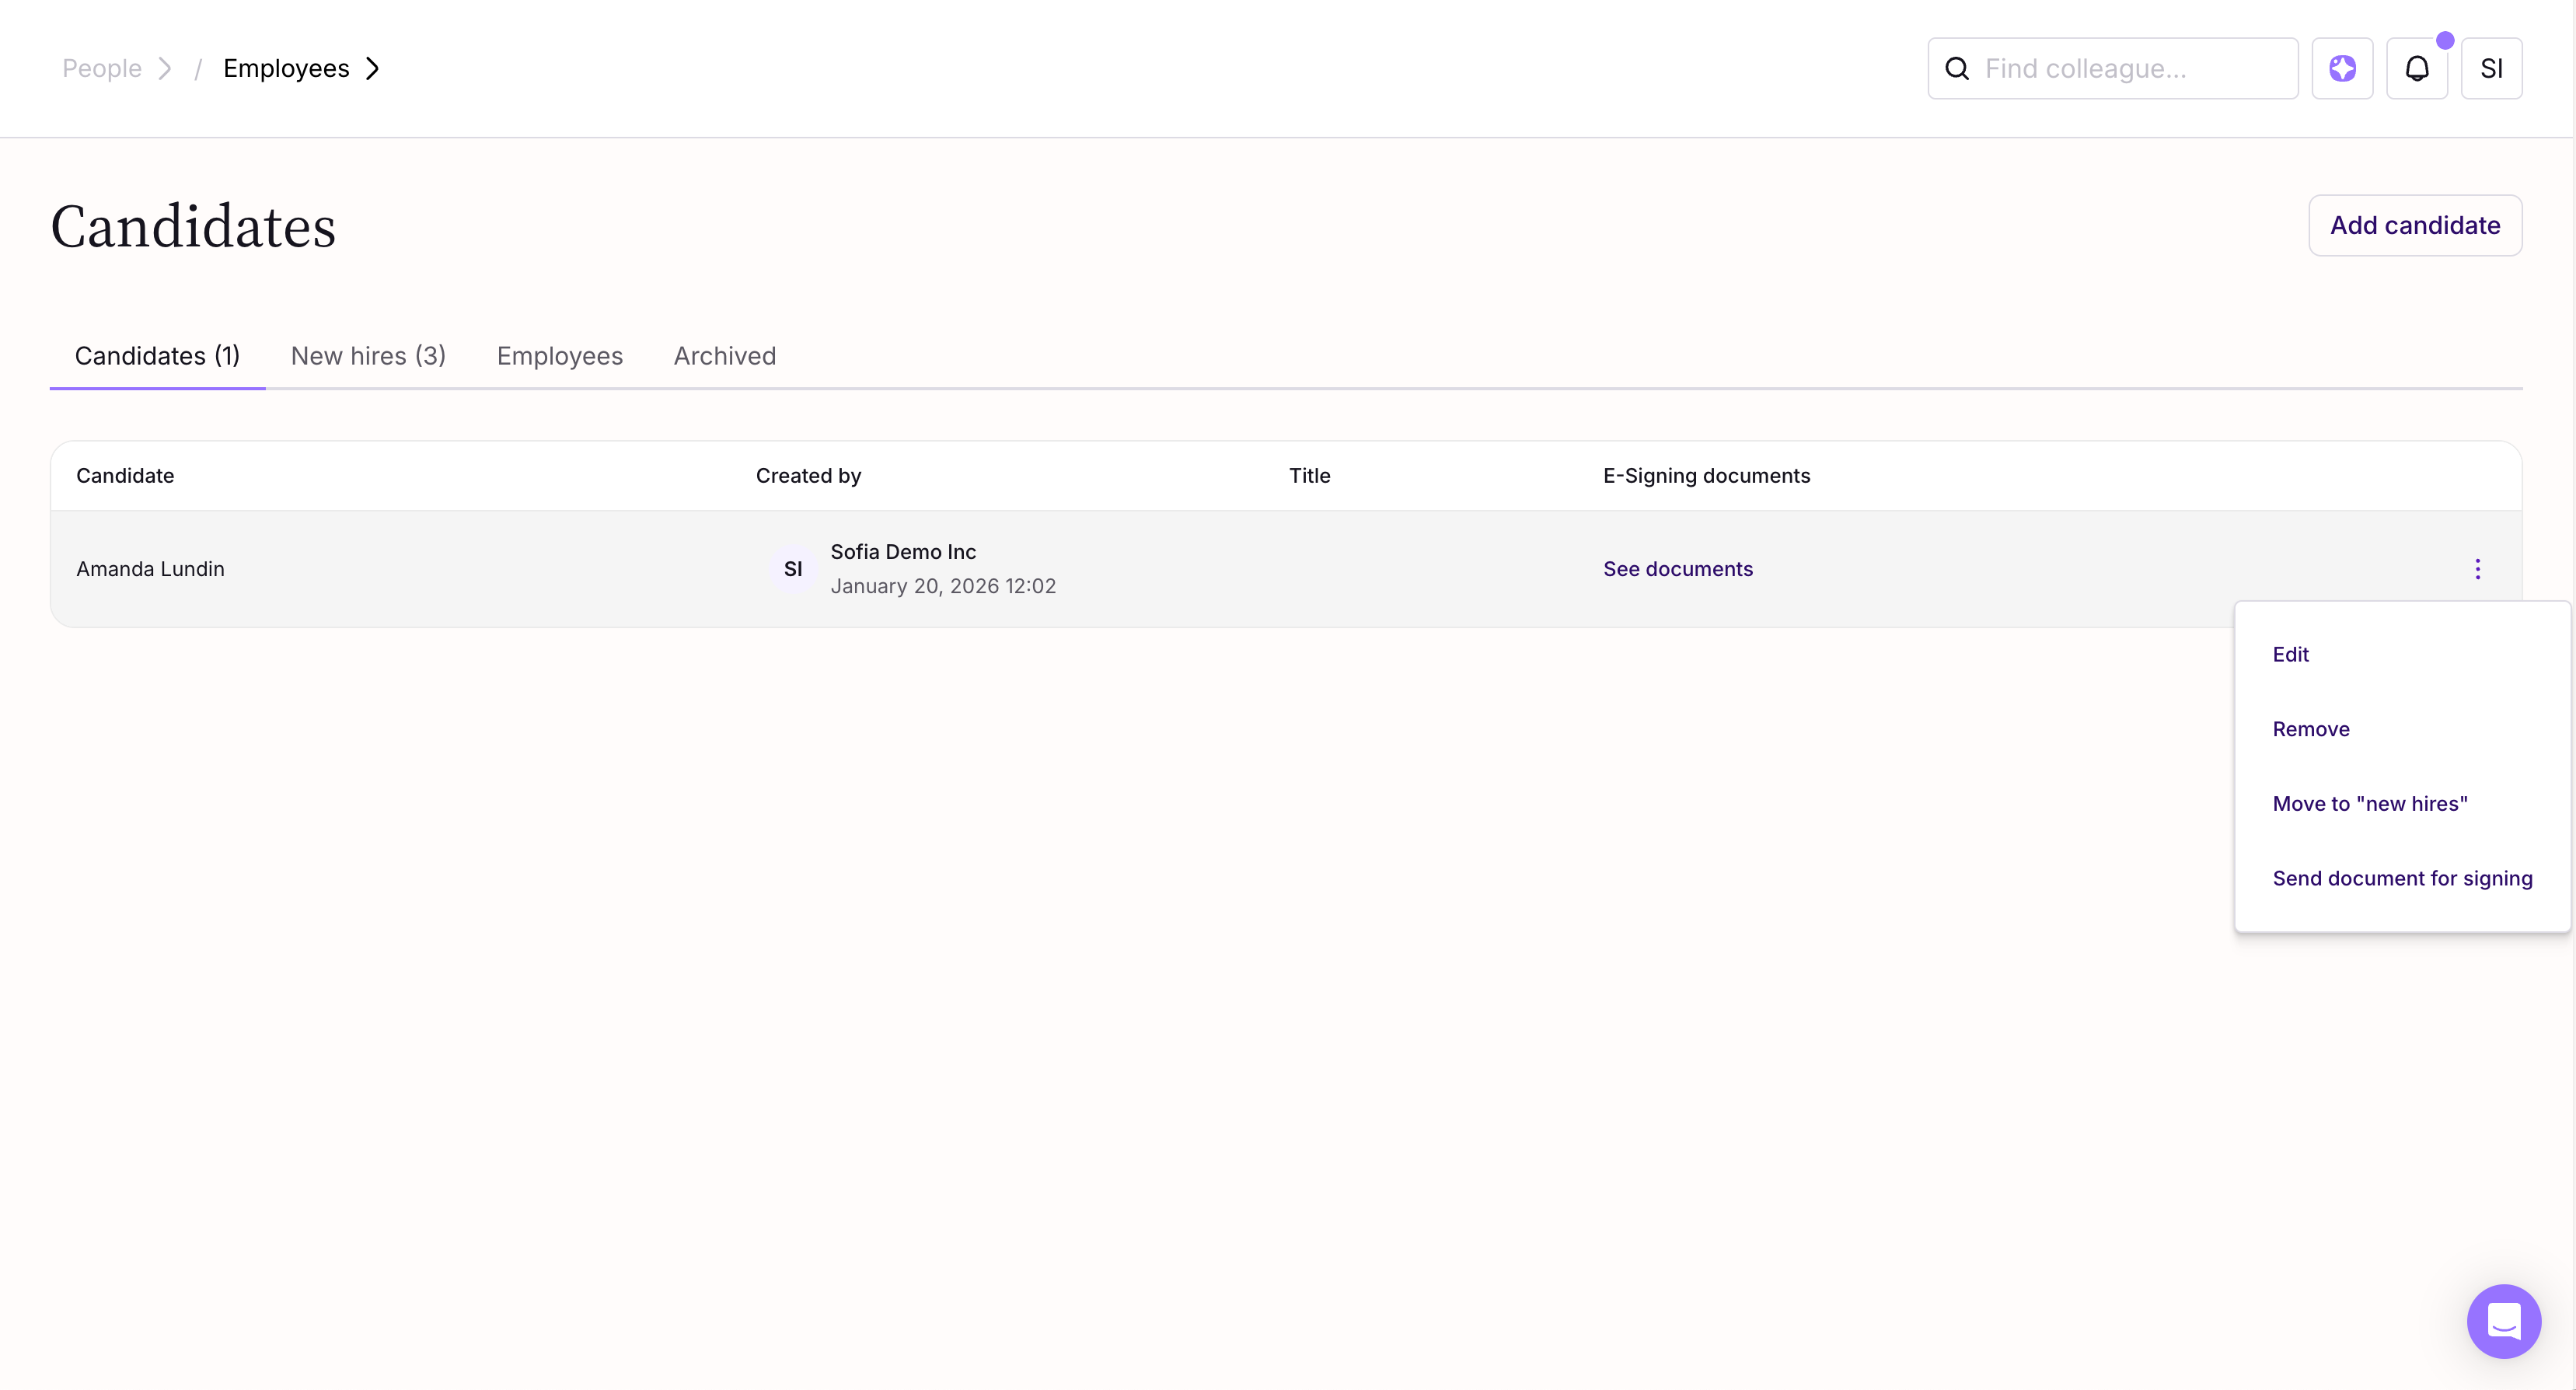
From the Actions (three dots) menu, you can:
- Send documents for signing (email required)
- Move the candidate to New hires (creates an employee profile
- Delete the candidate card
Set Up a Signing Process
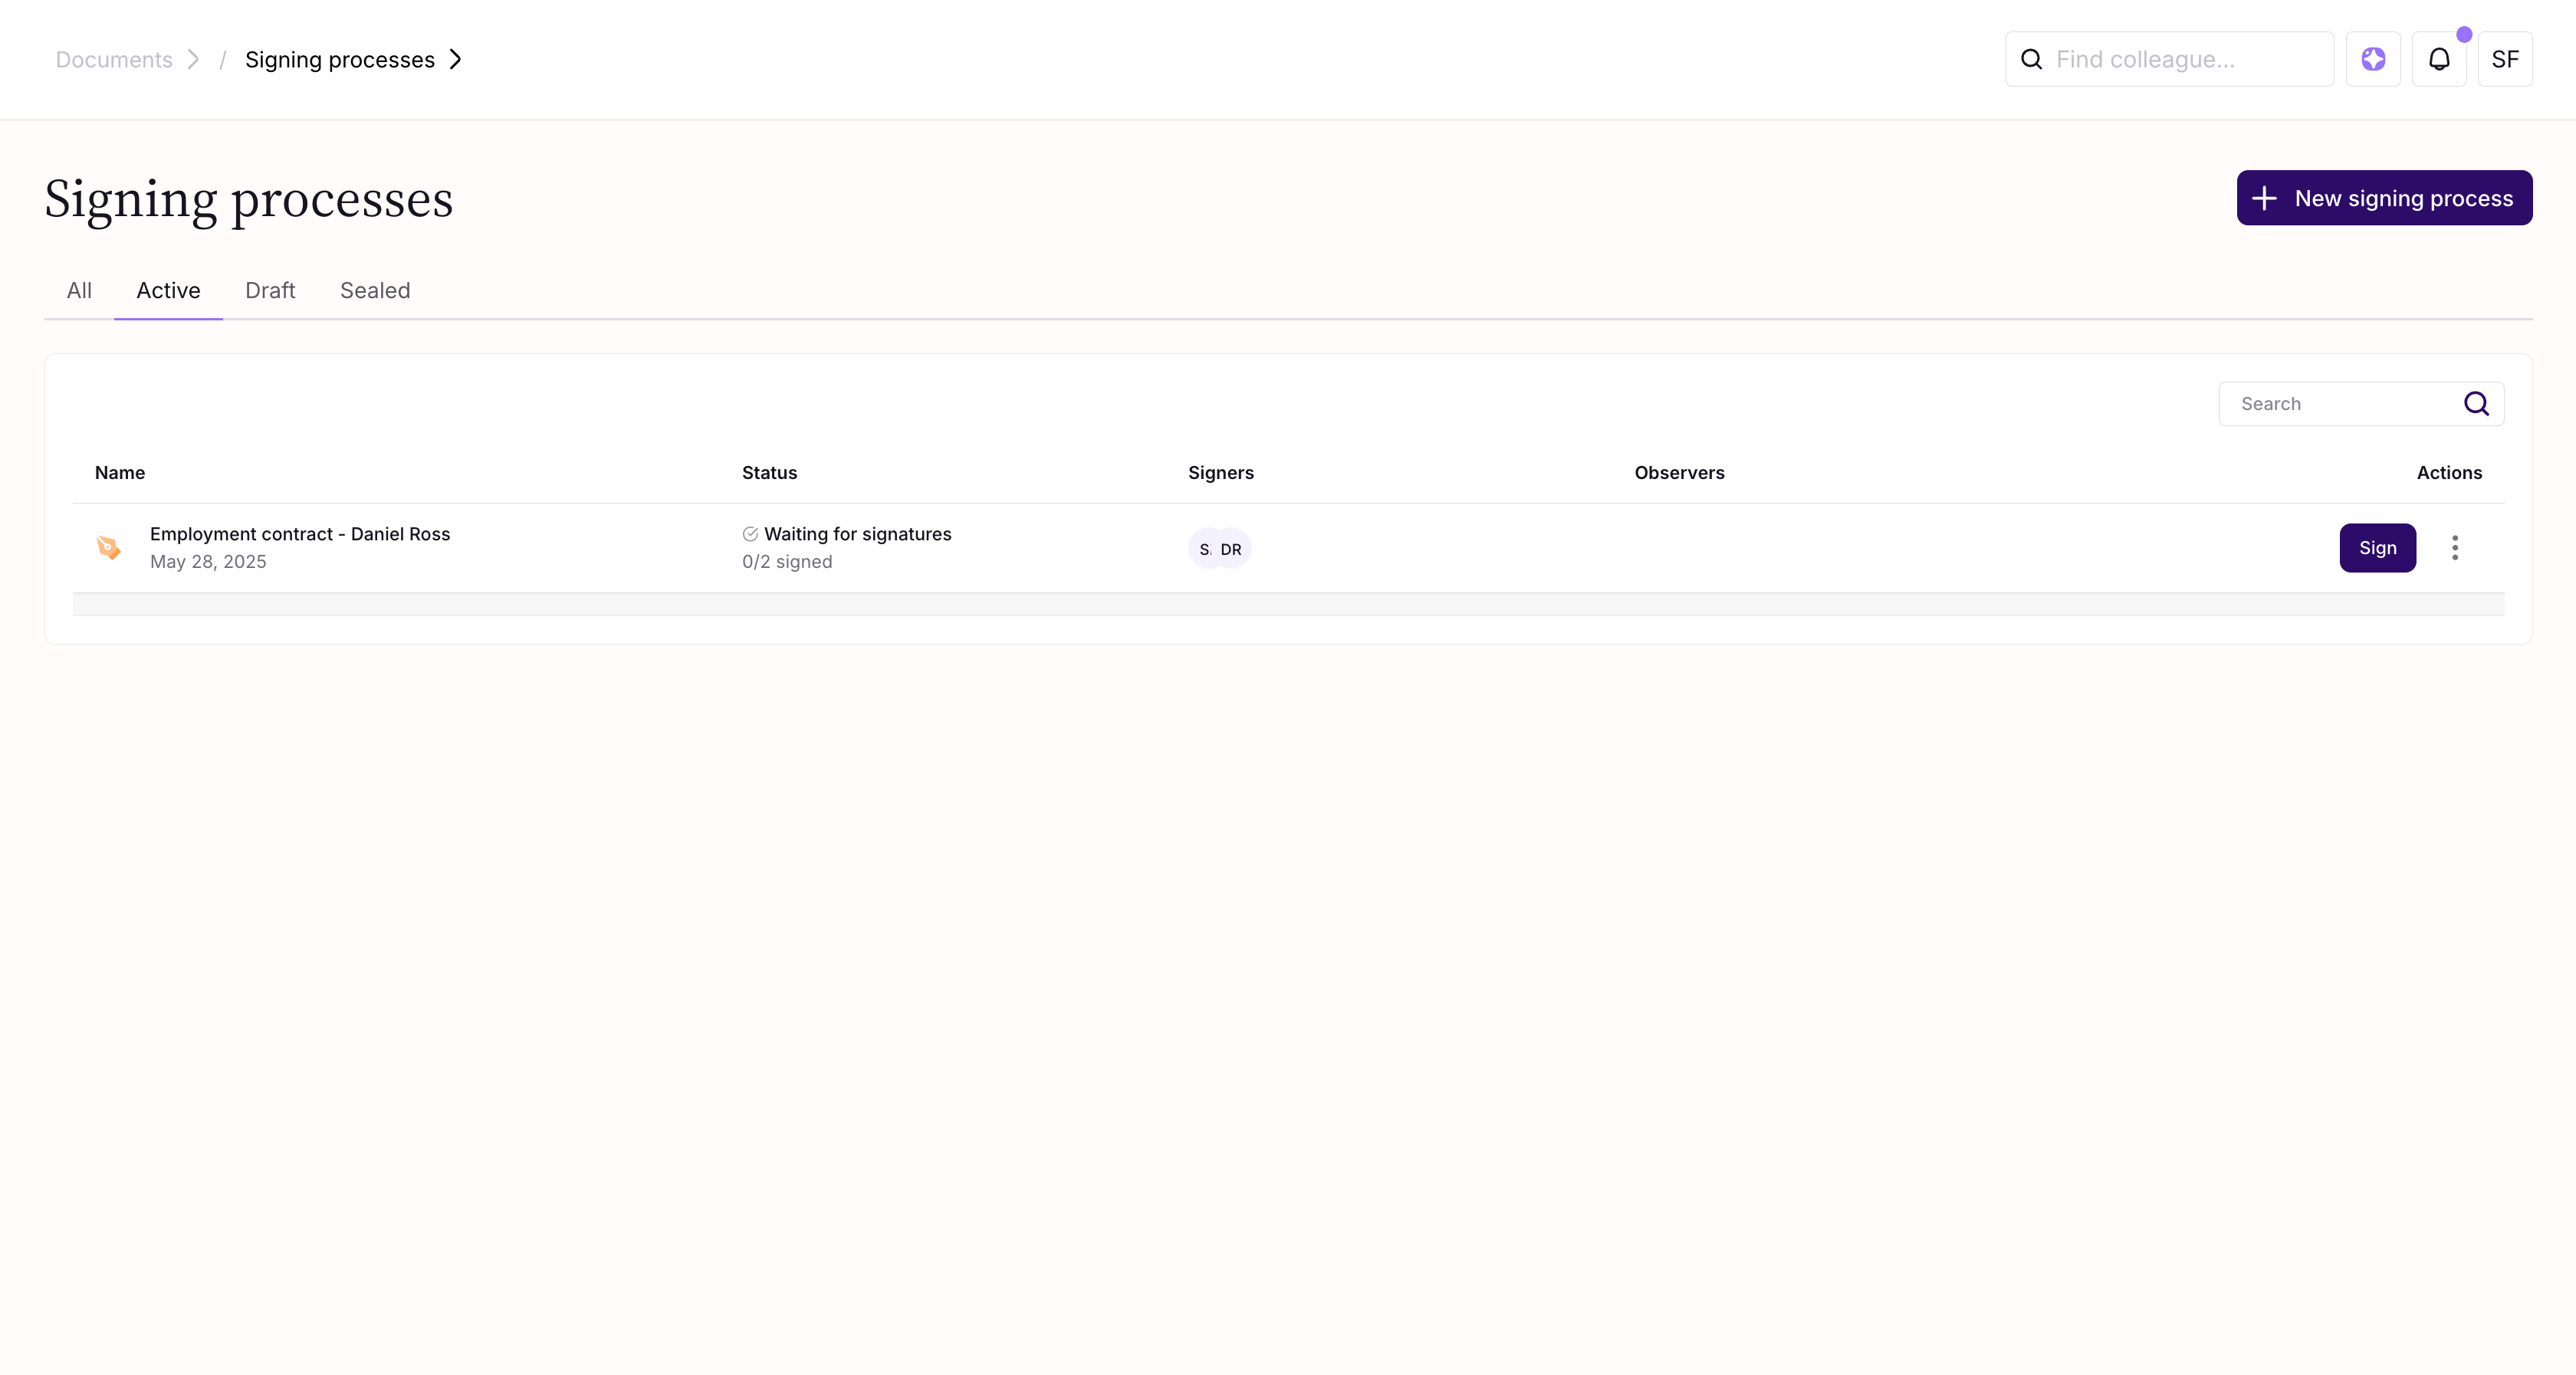
Path:
Documents → Signing processes → + New signing process
Steps:
- Name the signing process (e.g. Amendment of Employment Contract – Bill Dexhart)
- Choose an existing template or create one from scratch
- Add the target employee
- Candidates appear at the bottom of the list
- Add signing parties and observers (e.g. manager, CEO, team leader)
- (Optional) Disable New signature notifications for this process
- Preview the document if needed
- Click Send or save it as a draft
Once all signing parties have signed, the document is sealed.
- The signed PDF can be downloaded
- It is automatically available under My documents / Shared documents for signers and observers
If a mistake is made or circumstances change, the signing process creator can revoke a signing process.
How to Revoke:
- Go to Signing processes
- Open the Active tab
- Click the three dots
- Select Revoke signing
All involved parties will be notified.
Edit on Ongoing Signing Process
If you need to make changes to an active signing process, you can edit it so you don’t need to start the process from scratch.
What Happens When You Edit:
- The current signing process is revoked
- All signers are notified
- A new draft is automatically created
- You edit the draft as needed
- Send the updated signing process again
E-Signing Notifications
During a signing process, the following email notifications may be sent:
Document signing process has started
- Sent to Observers
- Includes a link to view the document
New document to sign
- Sent to Signing parties
- Includes a link to sign the document
New signature
- Sent to Observers, Signing parties, and the Signing process creator
- Can be disabled during process creation
Document signed by all parties
- Sent when all required signatures are completed
Signing process revoked
- Sent if the signing process is revoked by the creator
Was this article helpful?
That’s Great!
Thank you for your feedback
Sorry! We couldn't be helpful
Thank you for your feedback
Feedback sent
We appreciate your effort and will try to fix the article